 NailCanvas
Create your own Nail on iPhone!
Instructions
Style
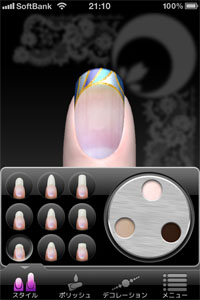
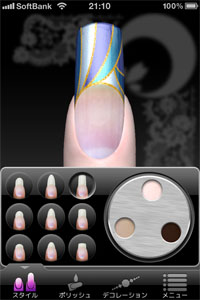
With a tap on the left button of the Style panel you can change the nail shape and length.
You can test how the same design looks different depending on the shape and length.
Rotating the dial on the right you can change the skin color.
You can test how the same design looks different depending on the shape and length.
Rotating the dial on the right you can change the skin color.
Art
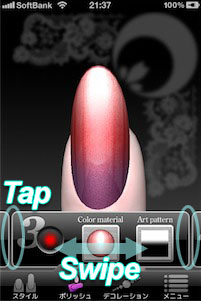
In the Polish panel you can set the color and the art pattern.
There are 5 panels, you can set the color and the art pattern for each panel.
You can choose the panel swiping from left to right or from right to left, or tapping the left or right margin.
The red button beside the panel number allows you to show or hide the selected color.
There are 5 panels, you can set the color and the art pattern for each panel.
You can choose the panel swiping from left to right or from right to left, or tapping the left or right margin.
The red button beside the panel number allows you to show or hide the selected color.
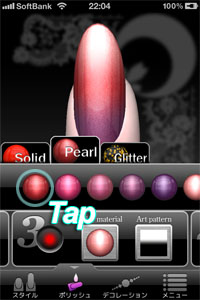
Tap the [Color Material] slot in the middle of the Polish panel and the color palette appears on top of the Polish panel.
Tap the color to paint the nail.
You can change to Solid color, Pearl color or Glitter with the upper tabs.
Tap the color to paint the nail.
You can change to Solid color, Pearl color or Glitter with the upper tabs.
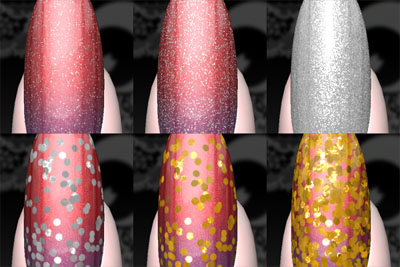
For Glitter, you can choose grain size, density and color.
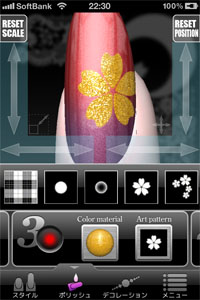
Tap on the [Art Pattern] slot on the right side of the Polish panel and the Pattern palette appears on top of the Polish panel.
Selecting one of the patterns will apply the pattern to the nail.
In the upper part of the screen you can change the scale and the position of the pattern.
Selecting one of the patterns will apply the pattern to the nail.
In the upper part of the screen you can change the scale and the position of the pattern.
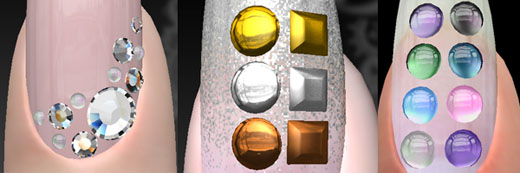
Decoration
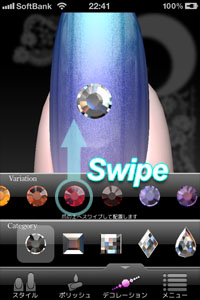
You can use the Decoration panel to place for example Rhine stones and metallic parts.
Choose the type from the bottom Category palette, and then swipe one from the color variation panel onto the nail to place it.
Choose the type from the bottom Category palette, and then swipe one from the color variation panel onto the nail to place it.
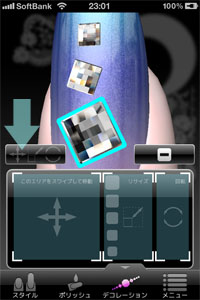
After placing the decoration, tap the edit button on the left to adjust position, scale and rotation for the decoration by swiping on the light green area.
If you tap on other decorations on the nail, a light blue border will appear then you can adjust it.
Tap on the [-] button on the right to remove the selected decoration.
If you tap on other decorations on the nail, a light blue border will appear then you can adjust it.
Tap on the [-] button on the right to remove the selected decoration.
Menu
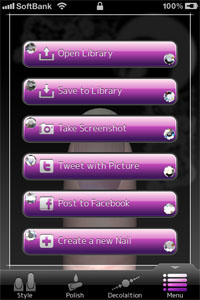
・Open Library
Tap to load data from the [Preset Library] for sample designs, or from the [User Library] for the data that you saved.
・Save to Library
Save the design data you created.
Input the design name and save.
・Take Screenshot
Save a screenshot to Camera Roll.
・Tweet with Picture
Post the screenshot on Twitter.
For the further instruction, please go to the next chapter.
・Share on Facebook
Share the screenshot on Facebook.
For the further instruction, please go to the Facebook chapter.
・Create a new Nail
Discard the current design and start over from scratch.